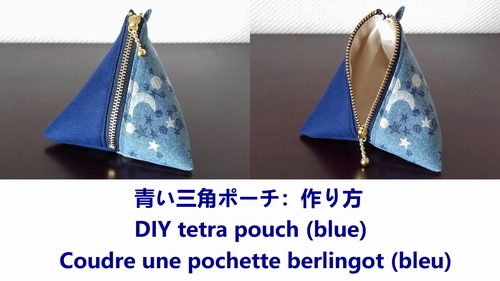
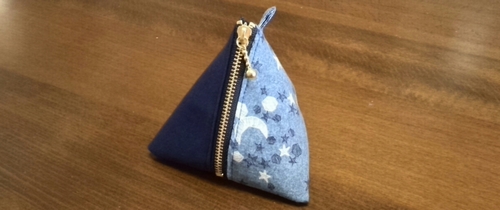
DIY Tutorial:How to sew a blue fabric triangle zipper pouch (sewing pattern is not necessary)
A tutorial of how I made a blue fabric triangle zipper pouch with lining. It is made mostly the same way as a standard zipper pouch except for making a triangle. It is also simple to make, so it is easy to make even for beginners.
I recommended using it to put candy inside and make it for a present for someone. After eating the candy, you can use it as a zipper pouch. Also, it is nice to put lip balm, hair accessories, or other accessories inside.
Materials
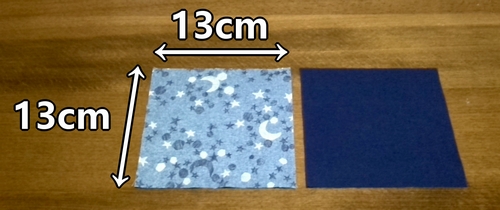
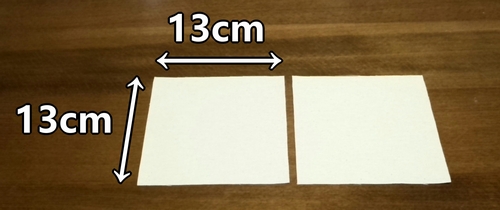
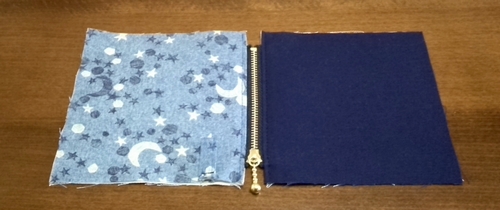
The 2 pieces of fabric for the exterior are 13cm x 13cm. (Seam allowances are included, interfacing to be attached)
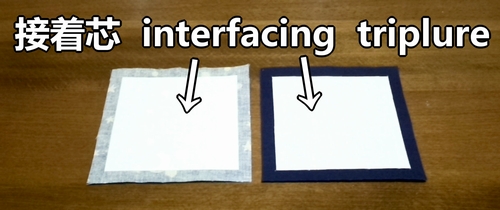
Fusible interfacing gives the fabric firmness, and helps to keep the shape of pouch.
The 2 pieces of fabric for the lining are 13cm x 13cm. (Seam allowances are included)
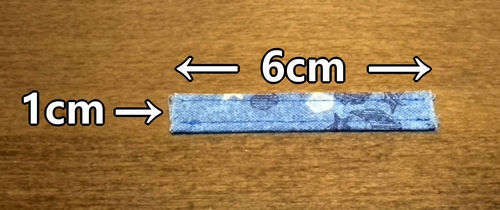
1 piece of tape or ribbon is needed for the tabs. (1cm x 6cm)
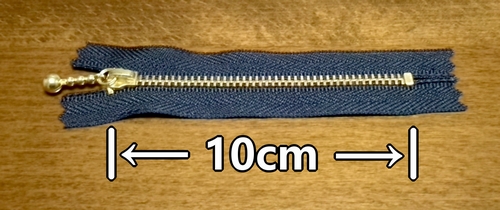
You will also need 10cm zipper.
For the zipper, fold the tape part at both ends and sew it in place.
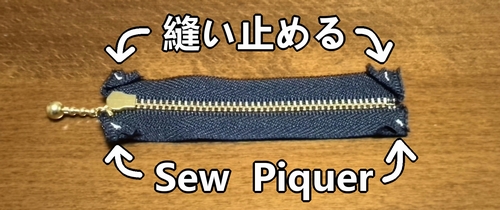
Fold the edge of the zipper so that it does not cover the seam allowance of the pouch. If the edge overlaps the seam allowance, it will be thicker and more difficult to sew, and it will also affect the finished look.
How to sew the zipper (install the zipper)
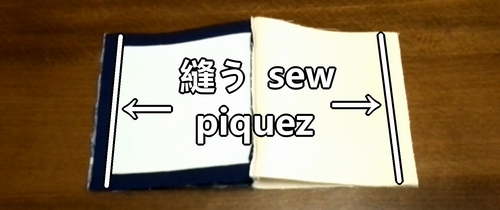
1. Sew the exterior fabric and zipper with right side together. (When sewing right sides together, the front side of each fabric is placed facing each other.) When sewing, use a needle to hold the zipper in place to prevent it from shifting. This will make it easier to sew.
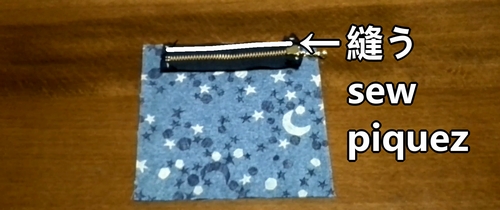
2. Then sew the exterior and lining with right side together.
The zipper is the most important part of the pouch. If you don’t know how to attach a zipper, or if you are not good at sewing zippers, please read this article. This article explains exactly how to do it.

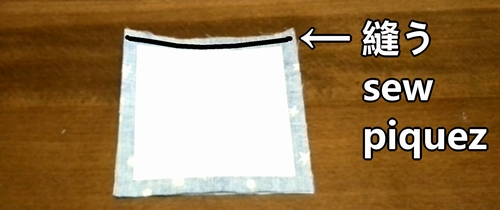
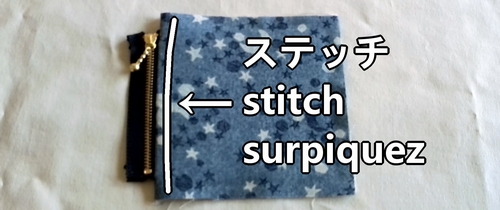
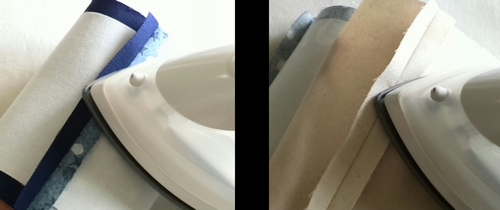
3. Fold the fabrics, and iron. Then stitch the edge.
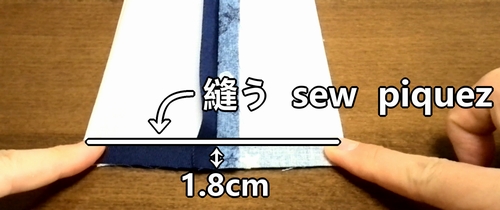
4. Baste the exterior fabric and tab (fold in half) together. (The ”stop” keeps the zipper’s slider in place; the top side is called the “top stops” and bottom side is called the “bottom stop”.)

5. Sew the other side of zipper in the same way.
6. Layer the exterior and lining fabrics each other, then sew the bottom part of the fabric together.
7. Press seam allowances open.
How to make the triangle pouch (finishing the triangle pouch)
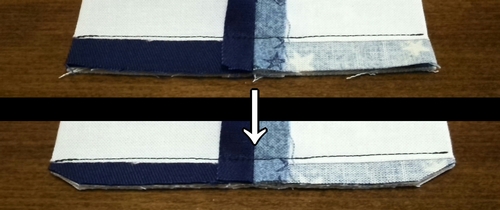
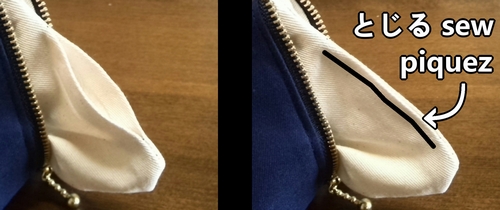
1. Overlap the exterior fabric and lining of the zipper’s bottom stop side. Then sew them together.
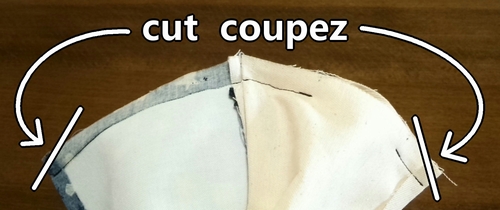
2. Cut off extra seams.
3. Layer the fabrics with right side, and sew the top stops side of zipper. (Leaving 5cm opening for turning.)

The part with the zipper became thick, so be careful when you sew.
4. Cut off extra seams.
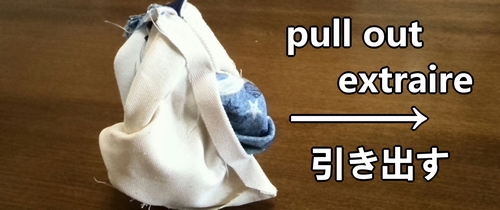
5. Press seam allowances open, and turn inside out.
6. Sew the edge shut. Your blue triangle zipper pouch is complete.
Following is the video for how-to.