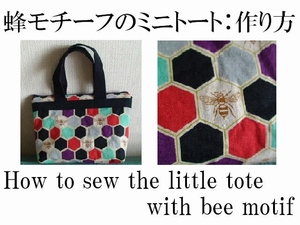
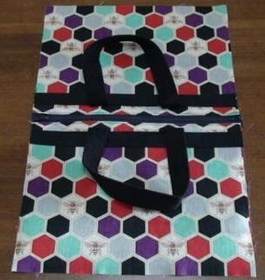
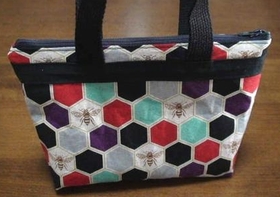
Make a bee motif tote bag with zipper (How to make a lined tote bag with zipper and gussets)
Make a tote (tote bag tutorial) : Zippered tote bag with bee and honeycomb pattern. A small-sized tote bag with a lining and gussets. I hope this helps anyone interested in making a mini tote bag by hand.
In the case of a zippered tote bag, attaching the zipper might be a bit tricky, but if you follow the steps carefully, you can complete it successfully. The finished size of this tote bag is approximately 17cm x 18cm, with a gusset width of about 5cm.
Materials for a small tote bag (Purse making materials)
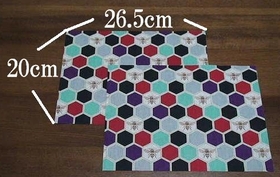
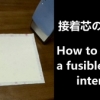
For the outer fabric of the small tote bag (zippered tote bag), prepare two pieces measuring 20cm × 26.5cm (including seam allowance). Apply fusible interfacing (ironable interfacing) to the back side.

Applying fusible interfacing adds firmness to the fabric, helping the tote bag maintain its shape and preventing it from sagging.
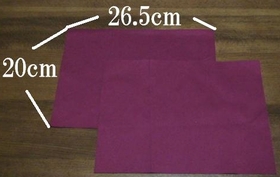
The lining of the small tote bag consists of two pieces, each measuring 20cm × 26.5cm. (Including seam allowances.)
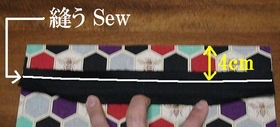
There are two patch pieces for the tote bag, each measuring 4cm x 26.5cm. (Including seam allowances.)

For the tote bag handles, prepare two pieces of webbing (Cotton webbing, Nylon webbing, Acrylic webbing, etc…), each measuring 2.5cm × 32cm. (Tote bag handles for tote bag making.)

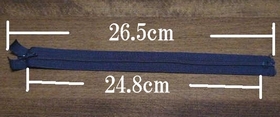
There is one 24.8 cm nylon coil zipper.
Attach the handles to the outer fabric of the tote bag (How to attach handles to a tote bag)
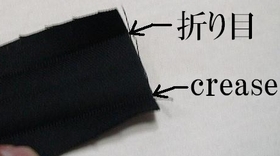
1. Fold both sides of the patch fabric for the tote bag by 1cm and press the folds.
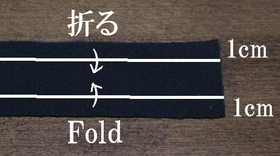
When sewing after folding the fabric, it’s a good idea to use an hot ironing ruler (hot hem ruler) to make the fold lines. It helps you fold the fabric accurately to the correct measurements, and the finished tote bag will look neat and clean.
2. Sew the patch fabric and the outer fabric of the tote bag together with right sides facing.

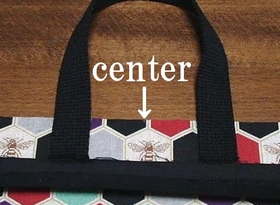
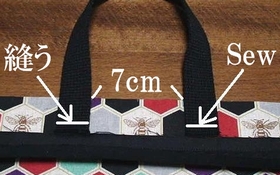
3. After that, sew the handles onto the outer fabric of the tote bag.
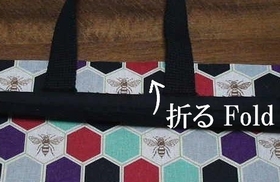
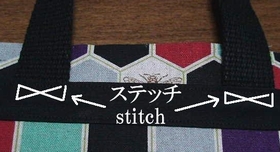
4. Fold the pre-creased patch fabric toward the handles and topstitch along the edge.
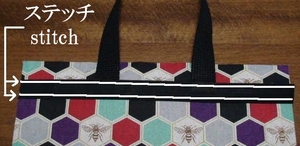
5. Reinforce the base of the handles with stitching.

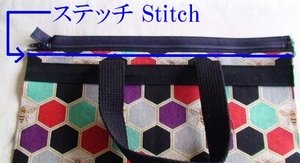
Attach the zipper to the tote bag fabric
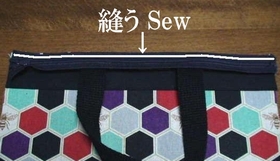
1. Sew the outer fabric of the tote bag and the zipper together with right sides facing. When sewing, pin the zipper in place to prevent it from shifting : this makes sewing easier.
2. After that, place the lining pieces right sides together and sew them together.
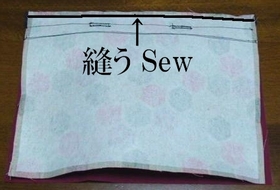
3. Iron the opening of the tote bag and topstitch it.
4. Sew the other outer and lining pieces to the zipper in the same way.
Unlike metal zippers, nylon coil zippers are thin and flexible, making length adjustment easy. The linked page explains how to shorten them by cutting with scissors and how to attach nylon coil zippers.
Join the outer fabric and lining to complete the zippered tote bag
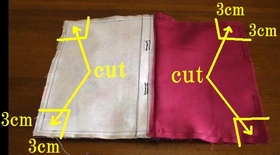
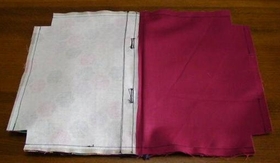
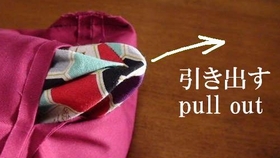
1. Place the outer fabric and lining of the tote bag separately with right sides together, and sew around the edges. (※Leave about a 8cm opening unsewn for turning.)
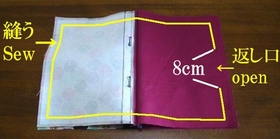
The area where the zipper is attached is thicker, so you need to be careful when sewing.
2. Trim the corners of the fabric, press the seam allowances open, and create the gussets of the tote bag.
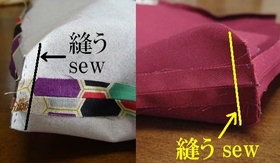
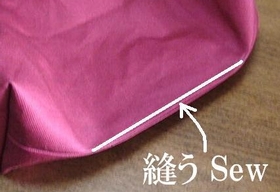
3. Turn the bag right side out through the opening, then sew the opening closed. With this, the small tote bag with the bee motif is complete.
Following is the video for how-to.