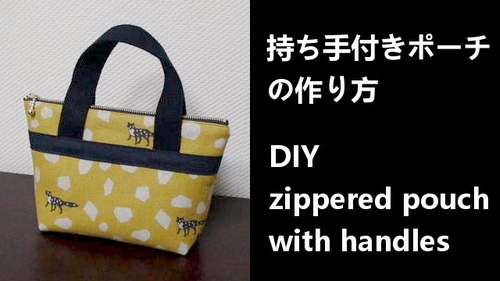
How to make a zippered pouch with handles (sewing pattern is not necessary)
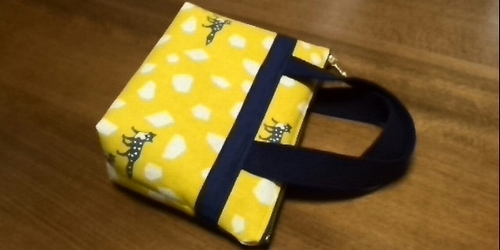
Today’s DIY (handmade item) is a “zippered pouch with handles“. It is a pouch of just the right size to put small items such as wallets and smartphones. When you feel like you don’t want to carry a bag but hesitate to go out empty-handed…this pouch helps.
I think that it’ll come in handy when taking a stroll in the neighborhood and shopping at convenience stores. The finished size is about 13cm x 15cm, with a gusset length of about 6cm.
Materials
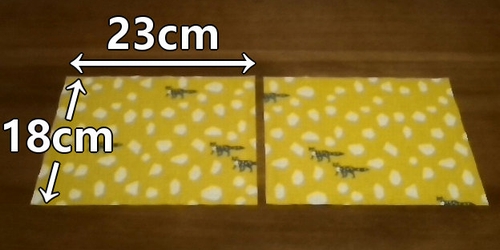
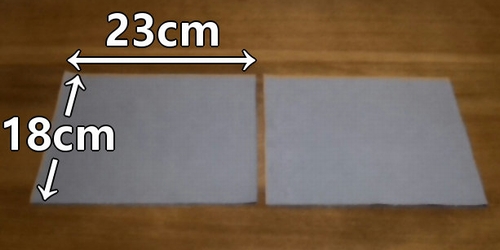
The two pieces of fabric for the exterior are 18cm x 23cm. (Seam allowances are included, interfacing to be attached)
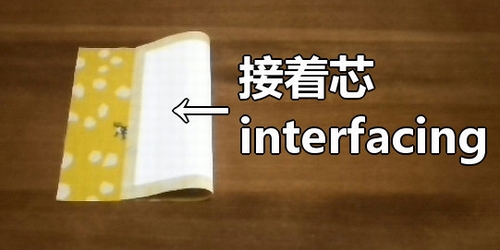
Fusible interfacing gives the fabric firmness, and helps to keep the shape of pouch.
The two pieces of fabric for the lining are 18cm x 23cm. (Seam allowances are included)
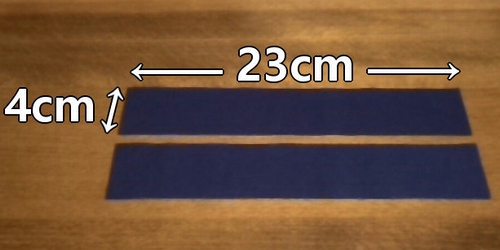
The two pieces of patch fabric are 4cm x 23cm. (Seam allowances are included)
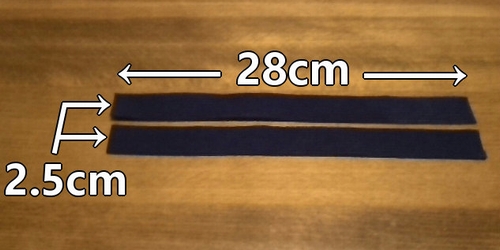
Handles are 2 pieces of 2.5cm x 28cm. The handles can be made from any fabric you like, but I recommend using acrylic webbing, available at craft stores. (This way is easier and more convenient.)
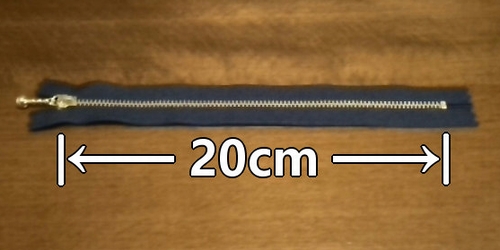
20cm zipper is 1 piece.
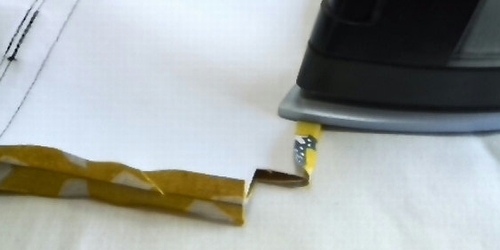
For the zipper, fold the tape part at both ends and sew it in place.
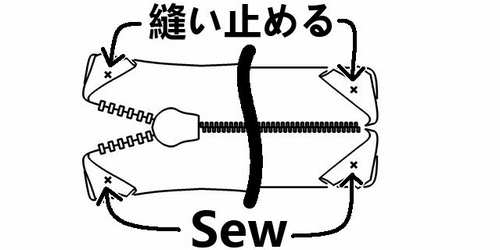
Fold the edge of the zipper so that it does not cover the seam allowance of the pouch. If the edge overlaps the seam allowance, it will be thicker and more difficult to sew, and it will also affect the finished look.
How to make the exterior
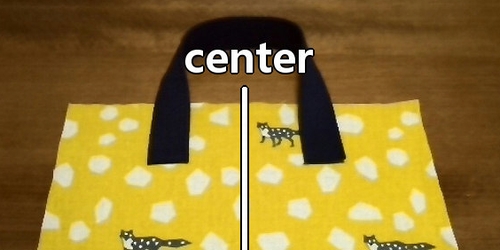
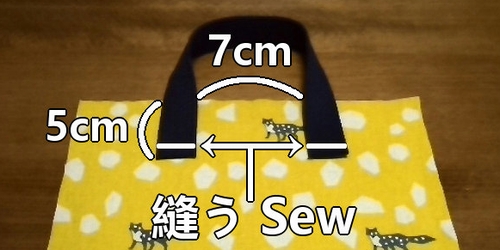
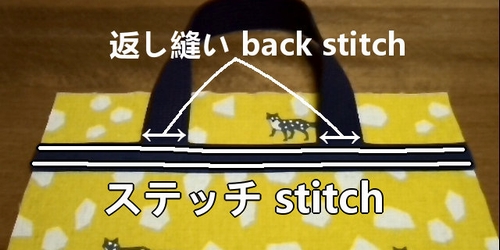
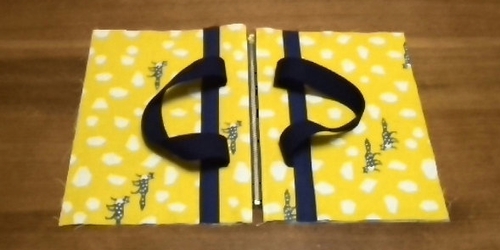
1. Sew the exterior fabric and handle together.
2. Place a 1cm crease on the top of patch fabric.
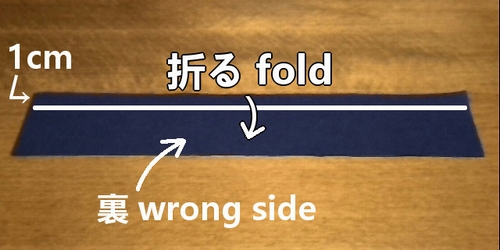
When making creases, it is recommended to use a hot sewing ruler to iron. (hot hemmer) It will make the creases tighter and the finished product more beautiful.
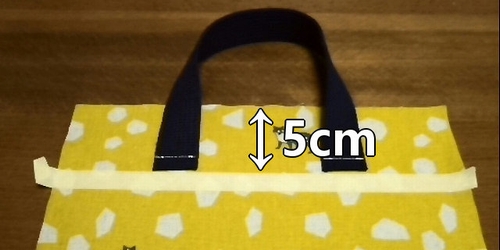
3. Attach a masking tape 5cm above the exterior fabric. (Since the tape is peeled off after sewing the patch fabric, use a weak adhesive type of tape. Strong adhesiveness can damage the fabric.)
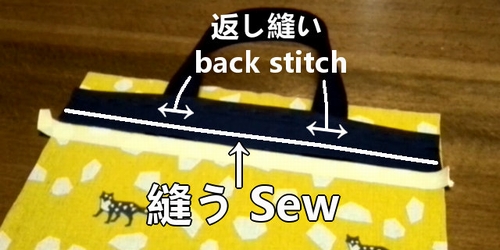
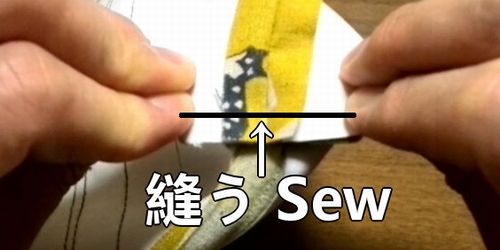
4. Place the patch fabric with right side along the edge of the tape, then sew. (Right side means the front sides of the fabric are lined up with each other.)
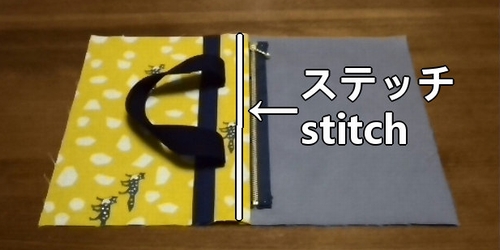
5. Fold the patch fabric, and iron. Then stitch the edges.
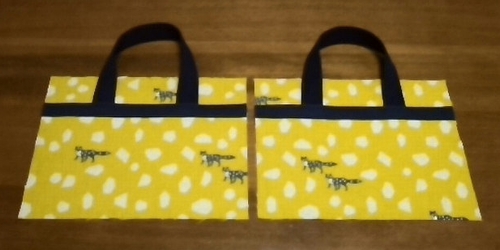
6. Sew the other exterior fabric in the same way.
How to sew the zipper (install the zipper)
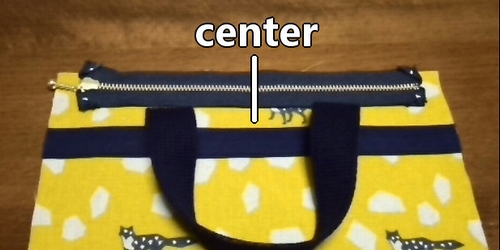
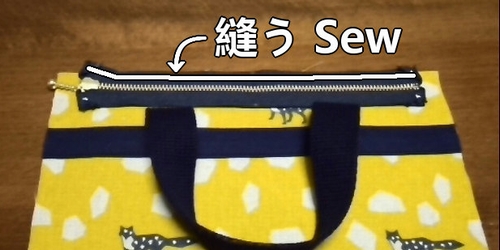
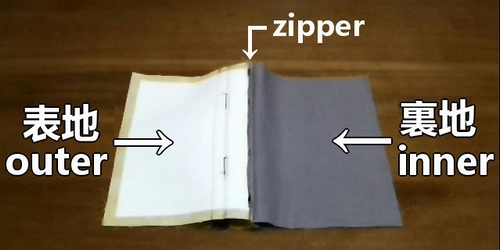
1. Sew the exterior fabric and zipper with right side together. When sewing, use a needle to hold the zipper in place to prevent it from shifting. This will make it easier to sew.
2. Then sew the exterior and lining with right side together.

The zipper is the most important part of the pouch. If you don’t know how to attach a zipper, or if you are not good at sewing zippers, please read this article. This article explains exactly how to do it.

3. Fold the exterior fabric over, and iron. Then stitch the edge.
4. Sew the other side of zipper in the same way.
How to make the pouch
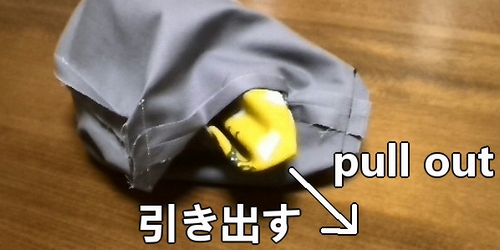
1. Lay the fabric with right side, and sew around. (Leave about a 7cm open for turning inside out.)
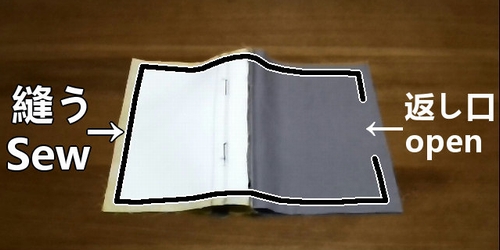
The part with the zipper became thick, so be careful when you sew.
2. Cut off extra fabrics, and press seam allowances open.
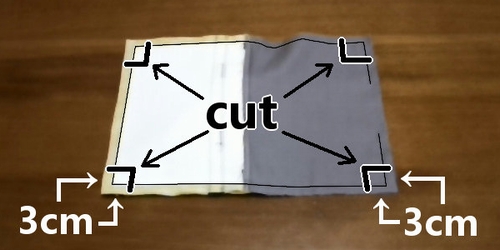
3. Make gusset, and sew.
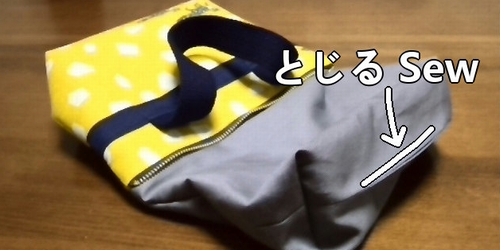
4. Turn the pouch inside out, and sew the edge shut. Your zipper pouch with handles is complete.
Following is the video for how-to.