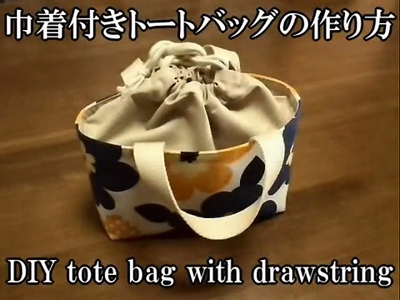
How to sew a drawstring tote bag (sewing pattern is not necessary)
Today’s DIY (handmade product) is a “tote bag with drawstring (with lining and a gusset)“. A drawstring is attached to the mouth so that the mouth can be closed.
The finished size is about 14cm x 20cm, with a gusset length of about 7cm, which is rather small for a tote bag. I think it is just right for a “lunch tote bag" where you can carry your lunch and drinks.
Materials
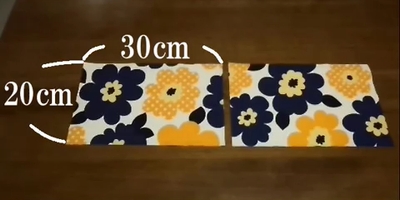
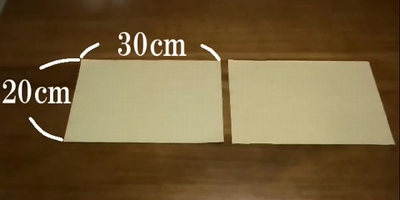
Outer body fabrics are 2 pieces of 20cm x 30cm sized fabric. (Seam allowances are included. Attach fusible interlining on the back.)
Fusible interfacing gives fabric firmness and keeps the shape of the tote bag.
Lining body fabrics are 2 pieces of 20cm x 30cm sized fabric. (Seam allowances are included)
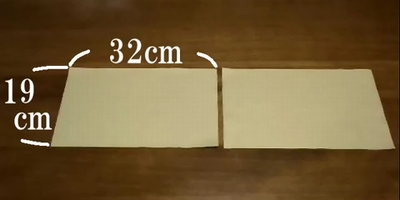
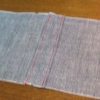
Drawstring fabrics are 2 pieces of 19cm x 32cm sized fabric. (Seam allowances are included)
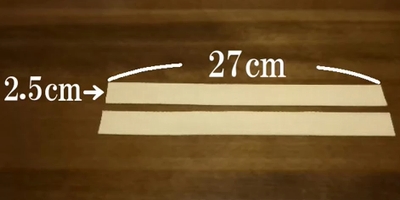
Handles are 2 pieces of 2.5cm x 27cm. Handles can be made by using any fabrics of your choice. Acrylic webbing tape is recommended from craft shop. (It is easy to make.)
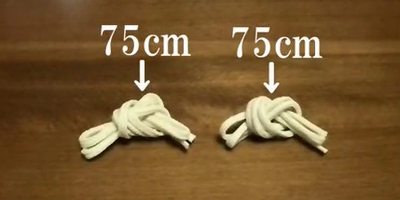
Cords for drawstring are 2 pieces of 75cm.
How to make the drawstring
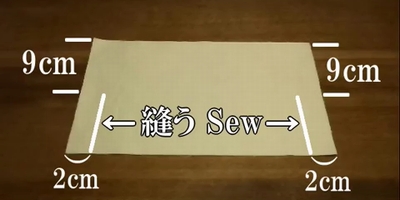
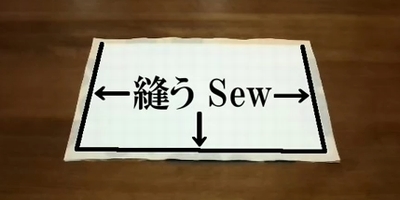
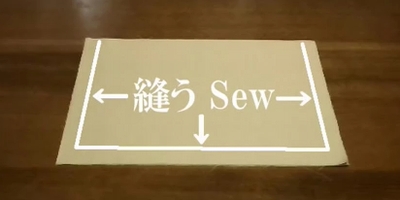
1. Place the drawstring fabrics with right side and sew the side with a 2cm seam allowance. (Don’t sew 9cm from the top because it will be the channel of the strings.)
2. After press seam allowances, open and fold the seam allowances inward. Then stitch the edges. This is called “top stitched seam.” I used this stitching because I can prevent fraying of seam allowances and finish it beautifully.
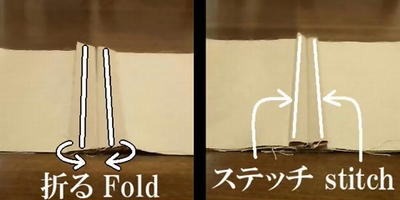
Top stitched seam is explained on this page.
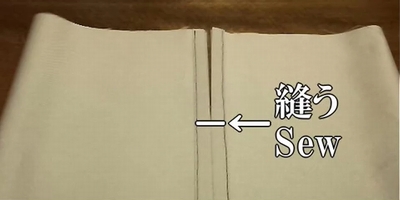
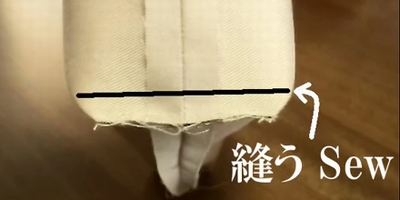
3. Sew until the end of opening. (Sew the crotch end.) The end of opening is the border between the opening without seams and the part with seams. This is the area where force is applied when putting things in and out from the bag, and it is easy to fray. So, reinforce it with backstitch on a sewing machine.
4. Fold the fabric in three, and sew.
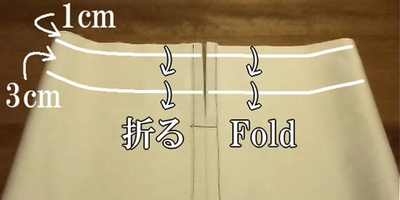
When making creases, it is recommended to use a hot sewing ruler to iron. (hot hemmer) It will make the creases tighter and the finished product more beautiful.
How to make the outer bag
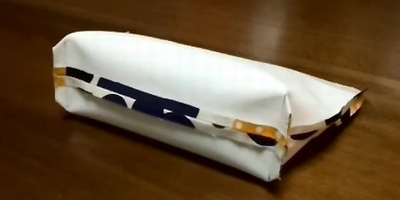
1. Place the outer fabrics with right sides facing each other and sew the side and bottom. (When sewing right sides together, the front side of each fabric is placed facing each other.)
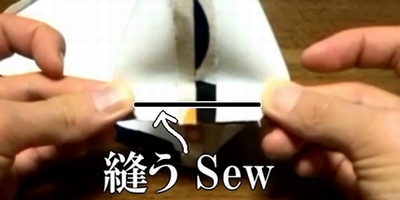
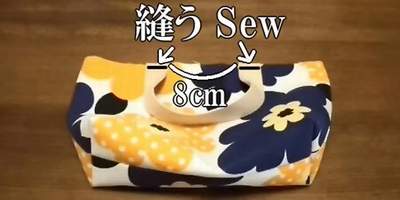
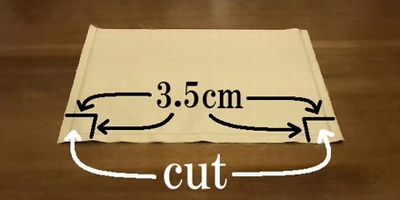
2. Cut off extra corner cloth and press seam allowances open. Then make gusset and sew. (Gusset adds depth to the bag.)
3. Sew the outer fabric and handles together.
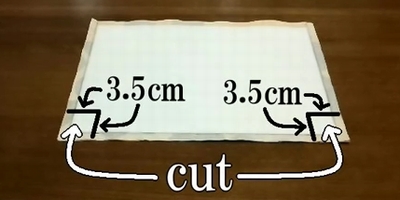
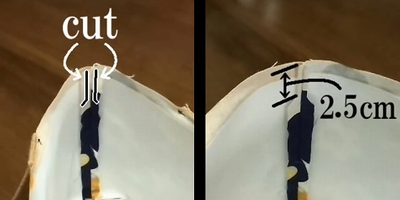
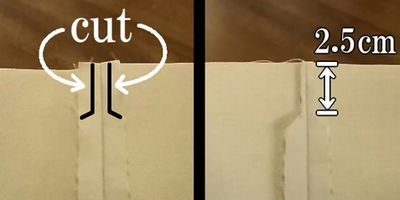
4. Cut the extra seam allowances. (2.5cm from bag opening)
How to make the lining bag
1. Place the lining fabrics with right sides facing each other and sew the side and bottom.
2. Cut off extra fabrics, and press seam allowances open. Then make gussets, and sew.
3. Cut the extra seam allowances. (2.5cm from bag opening)
How to make the drawstring tote bag (finishing the bag)
1. Insert the lining bag into the outer bag, with right side out. (When sewing right side out, the front side of each fabric is placed facing outwards.)
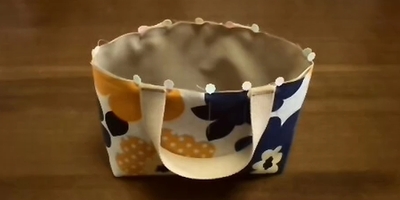
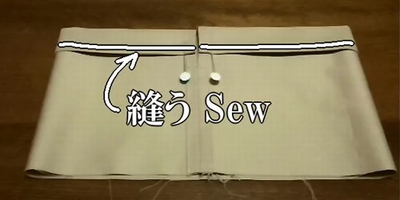
2. Place the bag (outer and lining) and drawstring fabric with right side together. Then sew around the entrance.
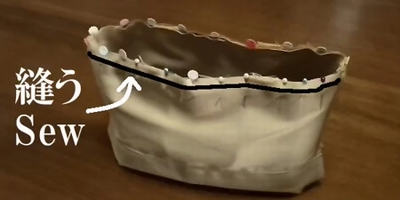
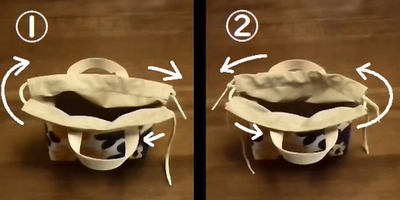
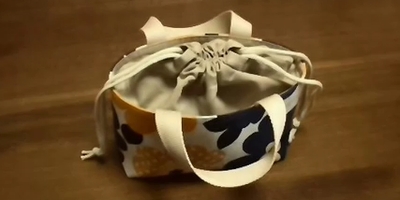
3. Stitch the edge of bag opening. Then thread the cord through. Your drawstring tote bag is complete. (There are many layers of fabric in the opening, and it’s quite thick, so stitch carefully.)

Following is the video for how-to.