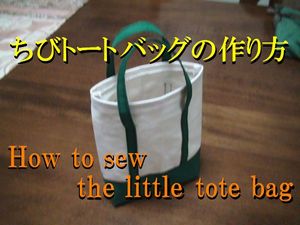
Make a little tote (Tote bag tutorial) – Simple tote bag with straight cuts and straight sewing
I’ll show you how to make a DIY mini tote bag with step-by-step images. This simple tote bag tutorial uses only straight cuts and straight stitching.
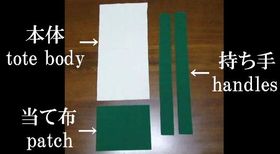
The bag making materials include a medium-weight natural-colored fabric for the main body of the tote bag, and solid green fabric for the handles and reinforcements.
Tote bag making materials
The bag making materials include three types of fabric : one for the main body, one for the reinforcements, and one for the handles.
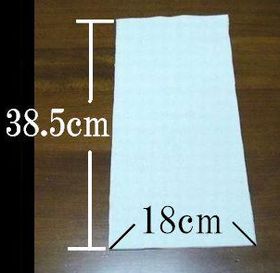
The fabric used for the main body of the tote bag is 38.5cm × 18cm in size. (1cm seam allowances are included.)
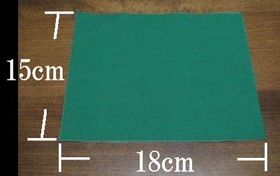
The reinforcement fabric used for the bottom of the tote bag measures 15cm × 18cm. (1cm seam allowances are included.)
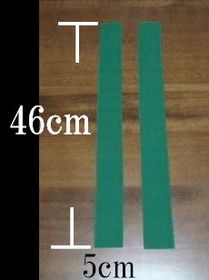
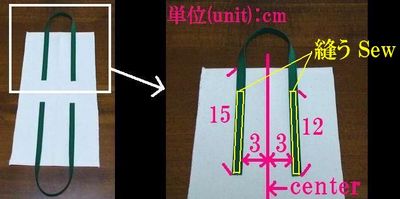
The fabric for the tote bag handles consists of two pieces, each measuring 46cm × 5cm. (1cm seam allowances are included.)
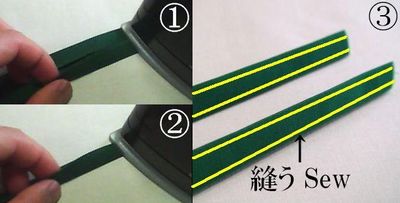
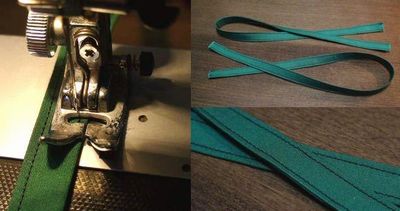
How to make handles for a tote bag
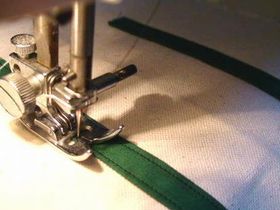
Fold the fabric into four, sew along both edges, and make the tote bag handles.
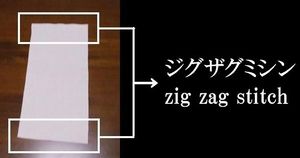
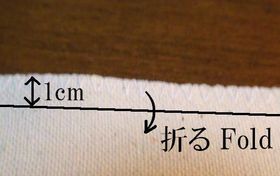
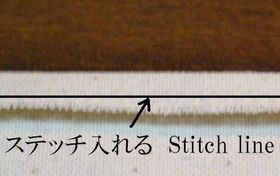
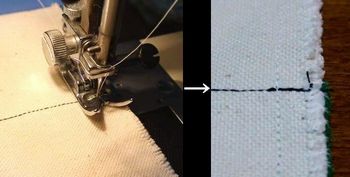
Finishing the raw edges of the tote bag body fabric
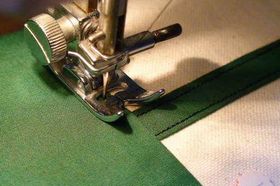
For the main body fabric of the tote bag, sew a zigzag stitch along the top edge (the bag opening), then fold it over and add a topstitch.

When making creases on fabric with an iron, using a cardboard ironing guide is recommended. It helps create sharp folds and results in a neat finish.
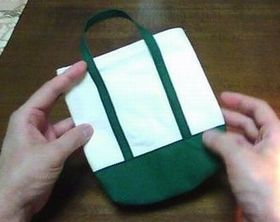
Attach the handles and reinforcement fabric to the main body of the tote bag
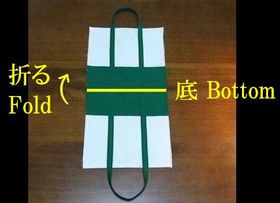
Attach the handles of the tote bag at the locations indicated in the picture.
After that, sew the reinforcement fabric onto the bottom part of the tote bag.

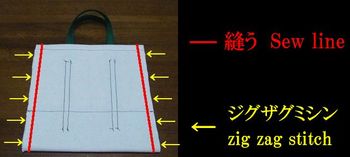
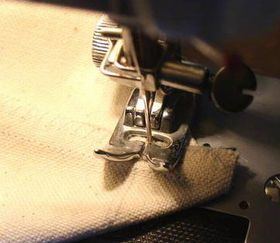
Fold the main body of the tote bag, sew the side seams, and finish with a zigzag stitch
Fold the tote bag body with the handles and reinforcement fabric attached in half, sew the side seams, and then finish the edges with a zigzag stitch.
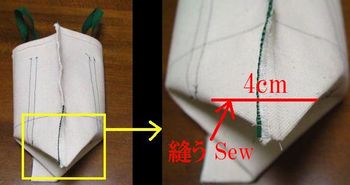
Create the gussets and finish the tote bag
Make a 4cm gusset at the bottom of the tote bag and sew it in place.
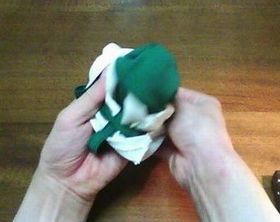
Next, trim off the excess fabric, finish the edges with a zigzag stitch, and turn the bag right side out. Your mini tote bag is now complete!

Making movie is the following.