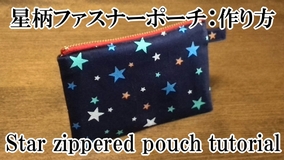
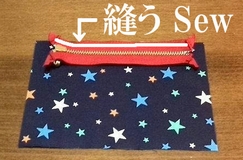
How to make a compact zipper pouch with star-patterned fabric (A simple zipper pouch for beginners)
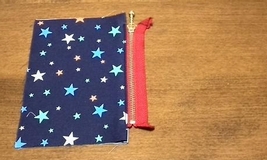
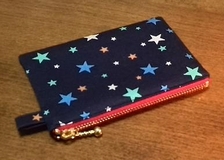
How to make a zipper pouch using star-patterned fabric. (Zipper pouch tutorial.) This pouch features a striking red zipper and is made using a 12cm zipper.
The steps are simple, making this zipper pouch perfect as a practice project for sewing machine beginners. By changing the fabric combination, you can create many different variations of this zipper pouch.
Why not enjoy the warmth of handmade work and create your own one-of-a-kind zipper pouch? The finished size of this star-patterned zipper pouch is approximately 8.5cm in height and 13cm in width.
Materials for the star-patterned zipper pouch (Star-patterned zipper bag making materials)
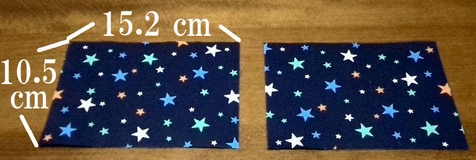
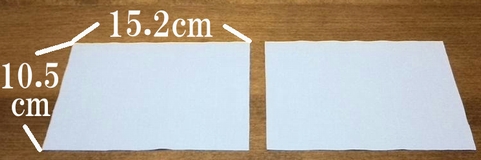
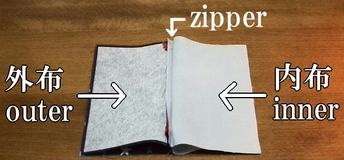
For the outer fabric of the star-patterned zipper pouch (zipper bag), you will need two pieces measuring 10.5cm × 15.2cm. (Seam allowances included, and fusible interfacing is applied to the wrong side.)
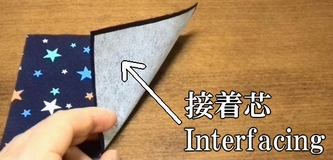
Applying fusible interfacing gives the fabric more stiffness, helping the zipper pouch (zipper bag) keep its shape.
For the lining of the star-patterned zipper pouch (pouch bag), you will need two pieces measuring 10.5cm × 15.2cm. (Seam allowances included.)
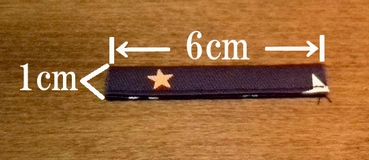
Prepare one tab measuring 1cm × 6cm for the pouch. (You can use matching fabric, tape, ribbon, or any fabric you like.)
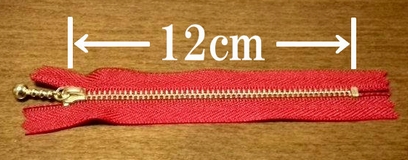
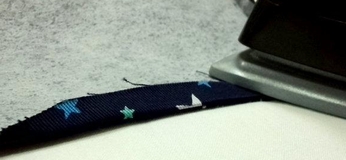
The zipper (zipper for bag making) is a single 12cm metal zipper.
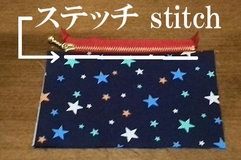
Fold the ends of the zipper tape – the top tape end and bottom tape end – into triangles and stitch them in place. When making a zipper pouch (pouch bag), finishing the ends of the zipper can make sewing a bit easier. It also has the advantage of giving your handmade zipper pouch a neater appearance.
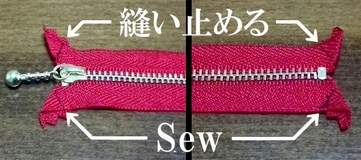
Fold the ends of the zipper tape (the top tape end and bottom tape end) so that they do not extend into the seam allowance of the pouch (pouch bag). If the zipper ends overlap the seam allowance, it adds bulk, making sewing more difficult and affecting the finished appearance.
Sew the zipper to the outer fabric and lining of the star-patterned pouch (How to attach the zipper to the pouch bag)
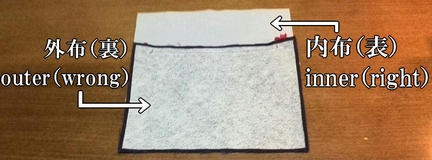
1. Place the outer fabric of the star-patterned pouch and the zipper right sides together, and sew them.
2. After that, place the lining right sides together and sew it in place.
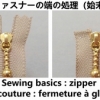
Attaching the zipper can make or break the finished look of your pouch (bag). If you don’t know how to attach a zipper or find it tricky to sew, check out this article. It explains the steps in detail.

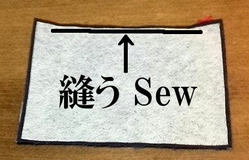
3. Fold back the outer fabric and lining of the star-patterned pouch, press with an iron, then stitch along the edge.
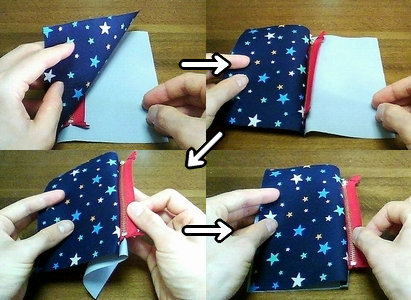
4. Sew the outer and lining fabrics to the other side of the zipper in the same way.
Sew the outer fabric and lining together to finish the star-patterned zipper pouch
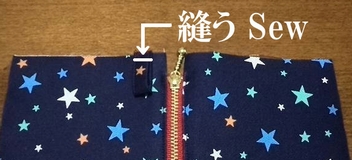
1. Sew the tab onto one side of the pouch’s outer fabric.
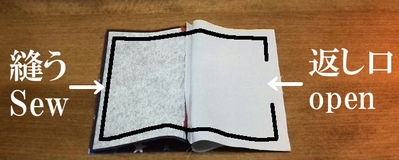
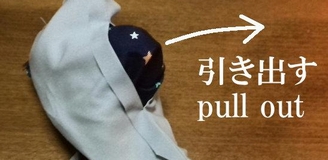
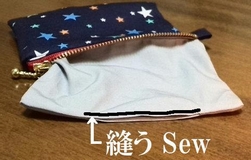
2. Place the outer and lining fabrics right sides together and sew around the edges. (Leave an opening of about 6cm unsewn for turning.)
The area with the attached zipper is thicker, so you need to be careful when sewing.
3. Cut the corners of the pouch fabric and press the seam allowances open.

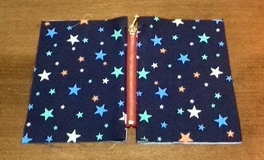
4. Turn it right side out through the opening and close the opening. The star-patterned zipper pouch (zipper bag) is now complete.
Making movie is the following.