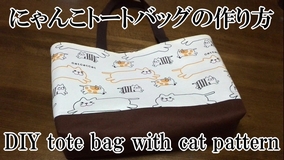
No pattern needed : How to make a cat-patterned tote bag (Make your own lined cat-pattern tote bag)
How to make a tote bag with cat-patterned fabric. (Homemade tote bag tutorial.) The fabric pattern is a bit unique, but the method for making the tote bag is simple and easy to follow. It’s a beginner-friendly tote bag that can be handmade without a pattern.
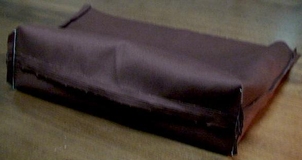
With a lining and gussets, this tote bag is highly practical and perfect for everyday use. The finished size of this cat-patterned tote bag is approximately 26cm in height, 33cm in width, and 9cm in depth (gusset). Why not make a tote bag you’ll love, using cat-patterned fabric? The outer fabric of the tote bag is oxford cloth, and the lining is brown canvas.
Supplies needed for a cat-pattern tote bag (Cat print tote bag making materials)
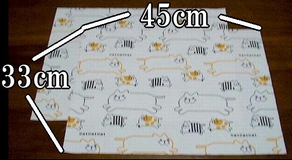
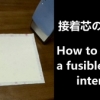
For the outer fabric of the cat-pattern tote bag, prepare two pieces measuring 33cm × 45cm (seam allowance included). Apply fusible interfacing to the back of each piece.
Applying fusible interfacing adds firmness to the fabric, helping the tote bag maintain its shape and preventing it from sagging.
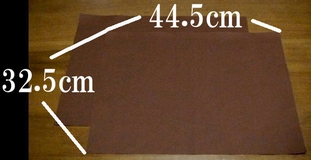
The lining for the cat-pattern tote bag consists of two pieces, each measuring 32.5 cm × 44.5 cm (seam allowance included).
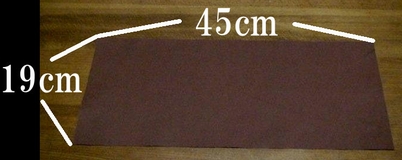
The reinforcement fabric for the bottom of the cat-pattern tote bag is one piece measuring 19cm × 45cm (seam allowance included).
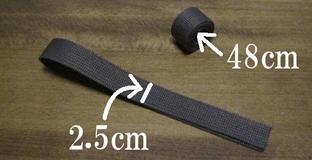
For the tote bag handles, prepare two pieces of webbing (Cotton webbing, Nylon webbing, Acrylic webbing, etc…), each measuring 2.5cm × 48cm.
You can make the tote bag handles with any fabric you like, but I recommend using webbing tape available at craft stores. It’s easier and makes the tote bag quicker to sew.
Make the outer fabric of the cat print tote bag (Make the outer bag of the cat-pattern tote bag)
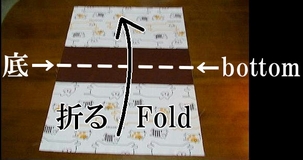
1. Sew the bottom of the tote bag’s outer fabric with right sides facing each other, then press the seam allowances open.
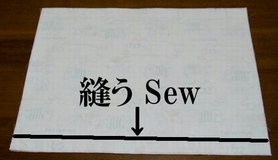
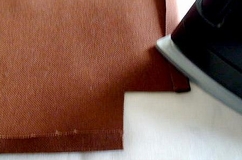
2. The patch fabric attached to the bottom of the tote bag is folded 1cm at the top and bottom edges, then sewn onto the outer fabric.

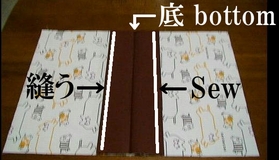
When folding the fabric before sewing it on, it is good to use an hot hemmer (hot hem ruler, hot ironing ruler) to create the crease. You can fold it precisely according to the measurements, and the finished tote bag will look neat.
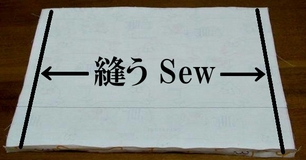
3. Fold the outer fabric of the cat-pattern tote bag in half with the right sides together, then sew the sides.
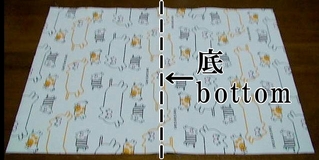
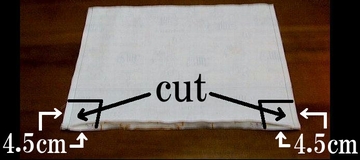
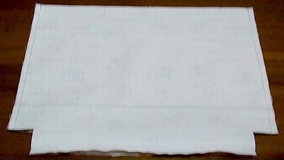
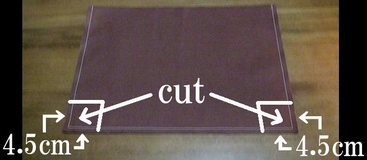
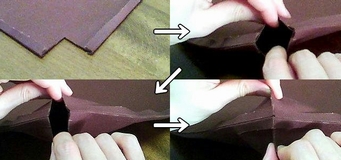
4. Cut the corners of the outer fabric, press the seam allowances open, and create the gussets for the tote bag.
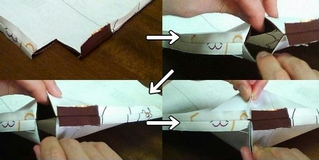

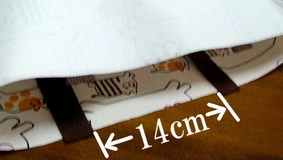
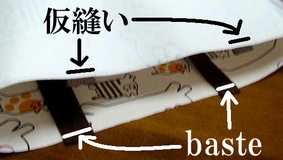
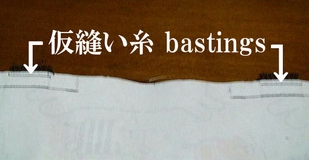
5. Baste the two handles of the cat-pattern tote bag to the outer fabric.
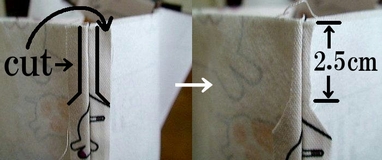
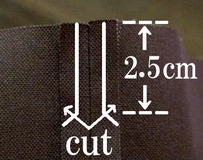
6. Trim about 2.5cm of the seam allowance from the opening of the tote bag. By cutting off the excess seam allowance, the fabric thickness is reduced, making it easier to sew.
Make the lining of the cat-pattern tote bag (Make the inner bag of the cat print tote bag)
1. The lining (inner bag) of the cat-pattern tote bag is made in the same way as the outer fabric (outer bag). Place the lining pieces together with the right sides facing each other, and sew the sides and bottom.
2. Cut the corners of the lining fabric, press the seam allowances open, and make the gusset of the tote bag.
3. Trim about 2.5cm of the seam allowance from the opening of the tote bag. By cutting off the excess seam allowance, the fabric thickness is reduced, making it easier to sew.
Sew the outer fabric and the lining together to finish the cat-pattern tote bag
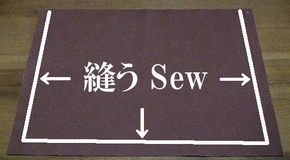
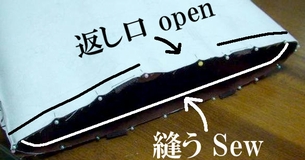
1. Place the outer fabric and the lining right sides together, and sew around the opening of the cat print tote bag. (Leave an opening of about 10cm to turn it right side out.)
2. Remove the basting threads from the handles of the tote bag.

3. Press the seam allowances open and turn the bag right side out through the opening.

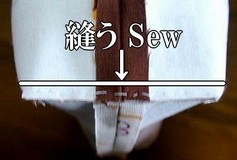
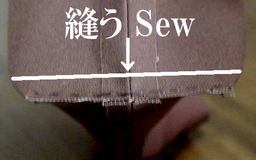
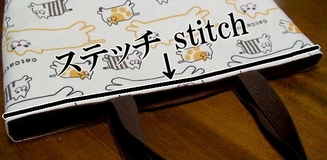
4. Press the opening of the tote bag with an iron to shape it, then stitch along the edge. Since the opening of the tote bag has many layers of fabric and is quite thick, work carefully.

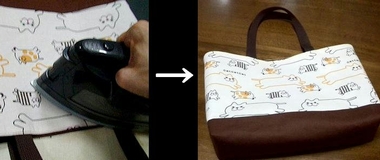
5. Finally, press the tote bag with an iron to finish and shape it. With this, the cat print tote bag is complete.
Following is the video for how-to.