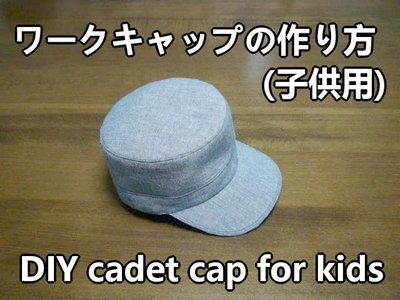
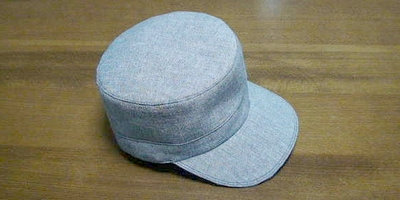
DIY tutorial:How to make a cadet cap for kids
Today’s handmade item is a “cadet cap for kids". This is a blue color fabric cap for a boy. I think it would be adorable to make a cadet cap for a girl by changing the fabric. A pdf pattern is provided for download.
Materials
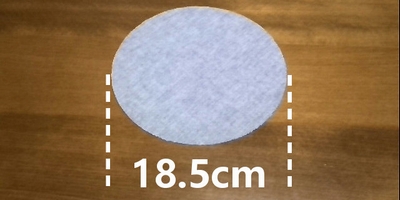
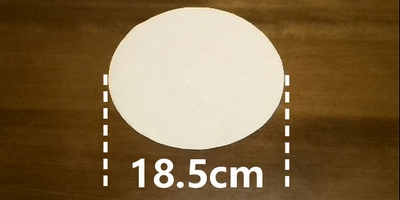
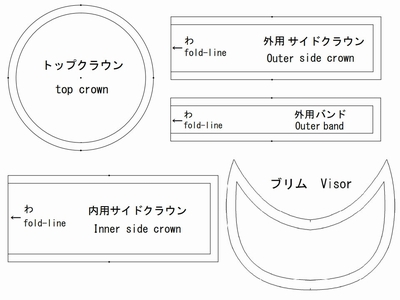
The 1 piece of fabric for the exterior top of the crown is 18.5cm diameter. (Seam allowances are included. Attach interfacing on the back.)
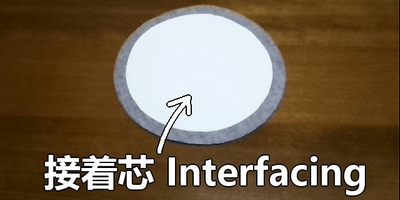
Fusible interfacing gives fabric firmness, and keeps the shape of the cap.
The 1 piece of fabric for the lining top of the crown is 18.5cm diameter. (Seam allowances are included)
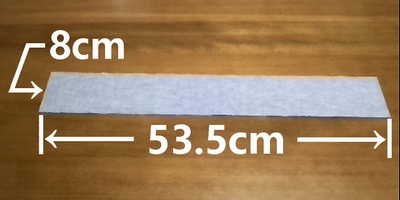
The 1 piece of fabric for the exterior side of the crown is 8cm x 53.5cm. (Seam allowances are included. Attach interfacing on the back.)
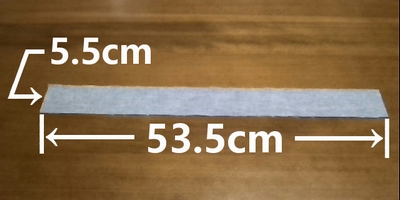
Exterior band fabric is 5.5cm x 53.5cm. (Seam allowances are included, attach interfacing)
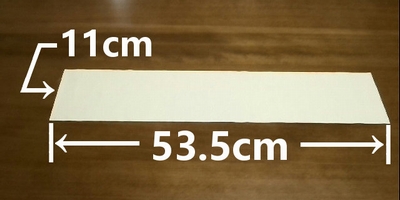
The 1 piece of fabric for the lining side of the crown is 11cm x 53.5cm. (Seam allowances are included)
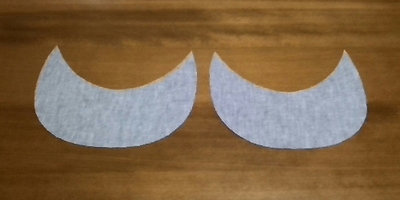
2 pieces of fabric for the visor (brim). (Seam allowances are included)
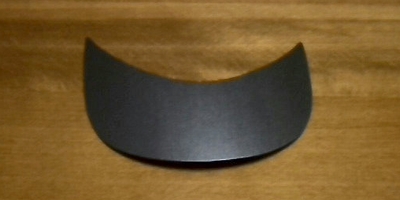
1 piece of poly core for the visor. (Cut off to shape. No seam allowances needed.)
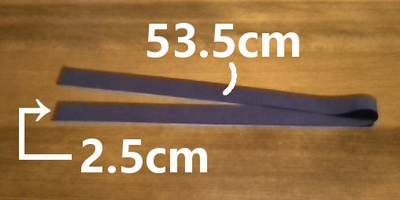
One strip of 2.5cm x 53.5cm sweatband. Sweatbands can be found at craft stores.
Paper patterns.
How to make the exterior crown
1. Sew the exterior side of the crown and band fabric with right side together. (When sewing right sides together, the front side of each fabric is placed facing each other.)
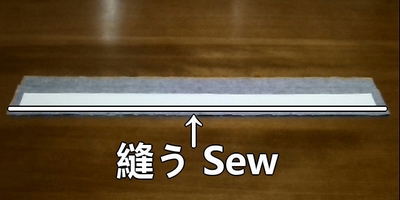
2. Press seam allowances over to the band side, and stitch.

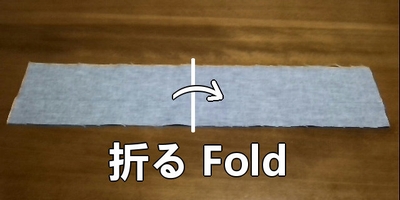
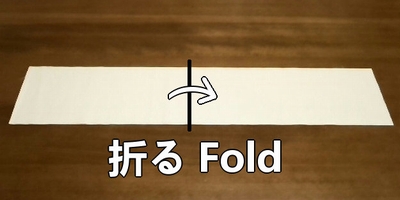
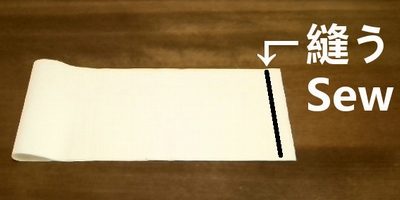
3. Fold the crown fabric in half with right side together. Then sew.
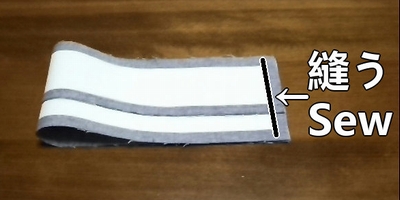
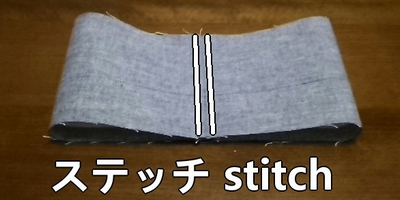
4. Press seam allowances open, and stitch.
5. Sew the side crown and top crown with right side together. (If needed, use iron-on double-sided adhesive tape to temporarily attach them together before sewing.)
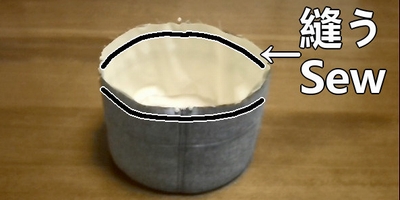
How to make the lining crown
1. Fold the lining side of the crown in half with right side together. Then sew.
2. Press seam allowances open.
3. Sew the lining side crown and lining top crown with right side together. (If needed, use iron-on double-sided adhesive tape to temporarily attach them together before sewing.)
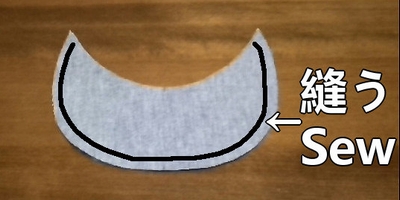
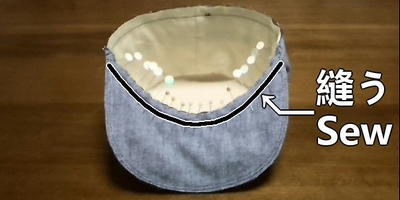
How to make the visor (brim)
1. Sew the visor (brim) fabrics with the right sides together.
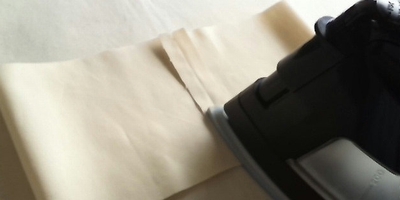
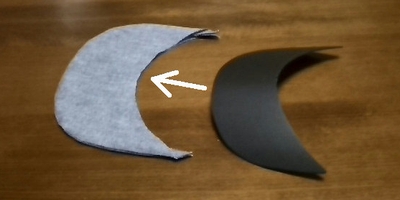
2. Make notches in the seam allowance, and turn inside out.

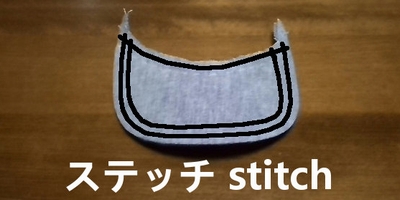
3. Insert the visor poly core. Then stitch the edges.
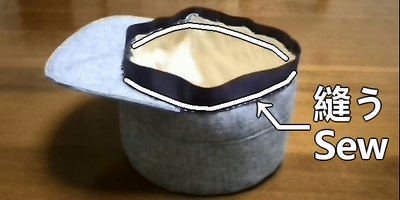
How to make the cadet cap (finishing the cadet hat)
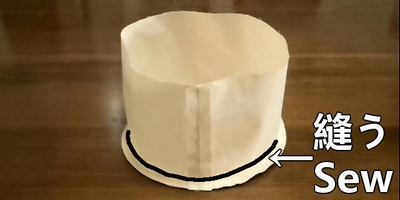
1. Sew the exterior crown and lining crown with right side out together. (When sewing right sides out, the front side of each fabric is placed facing outwards.)
2. Sew the crown and the brim with right side together. This may be the hardest part. Even with thorough basting, you may have a hard time sewing. But don’t worry, that’s just a fun part of handcrafting!
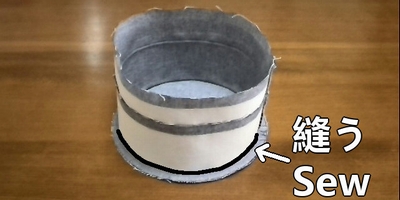
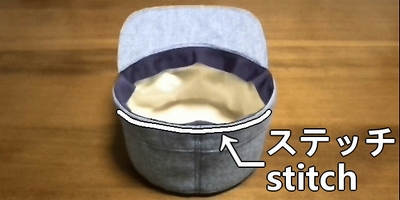
3. Stitch the sweatband along the bottom of the crown. Again, this could be tough, but try to stitch straight by basting thoroughly.
4. Fold the sweatband in and stitch. Your cadet cap for kids is complete.
Following is the video for how-to.